Slump Test Procedure to Check the Workability of Concrete
Concrete workability is one of the most critical aspects of any construction project. Without proper workability, concrete can become difficult to handle and place, affecting the overall strength and durability of a structure. One of the most commonly used tests to determine the workability of concrete is the slump test. This test provides a simple yet reliable way to measure the consistency of fresh concrete, ensuring that it can be easily placed and compacted without segregation.
What is the Slump Test?
The slump test is a practical test used on construction sites to measure the consistency and fluidity of fresh concrete. By determining how easily the concrete flows, it provides an indication of the material's workability. This test is quick, straightforward, and does not require complex equipment, making it ideal for routine checks on-site.
The test is especially useful for ensuring that the concrete mix has the appropriate amount of water for a specific project. Too much water will cause excessive slump, leading to weak concrete, while too little water will make the mix stiff and difficult to work with.
Apparatus Required for Slump Test
The equipment used in a slump test is relatively simple. Here is a list of the materials you need:
- Slump Cone (Abrams Cone): A conical mold made of metal, with a base diameter of 200 mm, top diameter of 100 mm, and height of 300 mm.
- Tamping Rod: A metal rod with a diameter of 16 mm and length of 600 mm, used for compacting the concrete.
- Measuring Scale: Used to measure the slump value in millimeters.
- Non-absorbent Base Plate: A rigid base where the test is conducted.
Procedure for Conducting a Slump Test
Step 1: Prepare the Concrete Mix
Ensure that the concrete mix is prepared according to the mix design. The test is conducted on fresh concrete, typically within 5 to 10 minutes after mixing to ensure accurate results.
Step 2: Place the Slump Cone on a Level Surface
Set the slump cone on a smooth, flat, non-absorbent surface, usually a base plate. The surface should be clean and free of any debris to prevent interference with the test results.
Step 3: Fill the Cone in Layers
Fill the slump cone with the fresh concrete in three layers:
- First Layer: Fill the cone to one-third of its height.
- Second Layer: Fill the cone to two-thirds of its height.
- Third Layer: Fill the cone to the top.
Each layer should be compacted using the tamping rod. For each layer, apply 25 strokes of the rod uniformly across the surface to ensure even compaction. This prevents air pockets and ensures accurate results.
Step 4: Level the Surface
After filling and tamping the third layer, use the tamping rod or a trowel to level off the surface of the concrete, ensuring that the concrete is flush with the top of the cone.
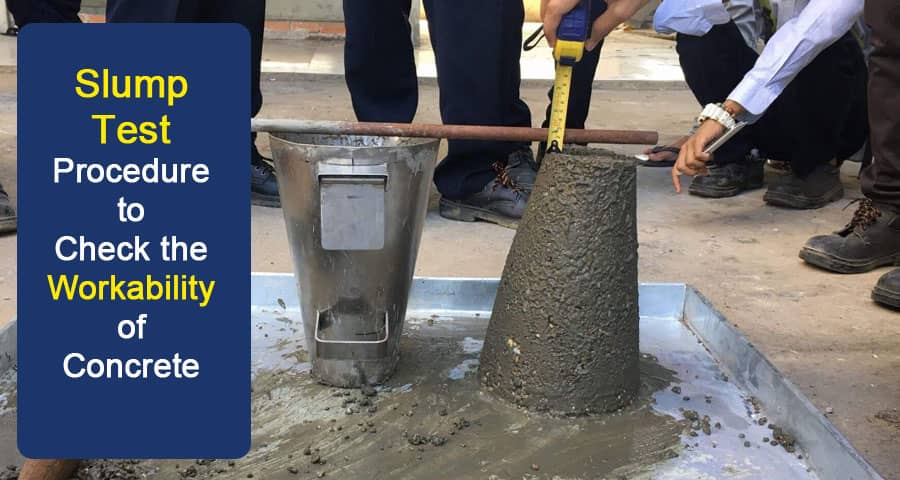
Step 5: Lift the Slump Cone
Carefully lift the slump cone vertically without twisting or tilting. The process should take about 5 to 10 seconds. The concrete will slump or settle, and the amount it slumps is measured to determine workability.
Step 6: Measure the Slump
Immediately after lifting the cone, measure the slump by placing a measuring scale beside the settled concrete and noting the distance between the top of the cone and the top of the slumped concrete. This value is recorded in millimeters.
Types of Slump
The result of the slump test can vary depending on the workability and consistency of the concrete. There are three types of slump patterns that can occur:
- True Slump: In a true slump, the concrete retains its shape and only subsides slightly. This indicates that the concrete has the correct balance of water and cement, providing adequate workability without excessive fluidity.
- Shear Slump: A shear slump occurs when part of the concrete shears off and slips down the side. This typically suggests poor cohesion in the mix or improper compaction, leading to potential segregation.
- Collapse Slump: If the concrete collapses completely, it indicates that the mix is too wet, and the concrete has low viscosity. This could lead to segregation and weak concrete structures.
Significance of the Slump Test
The slump test plays a crucial role in ensuring the quality and durability of concrete structures. Here are some of the primary benefits of performing this test:
- Quality Control: By ensuring the proper workability of concrete, the slump test helps avoid issues related to excessive water content, which can compromise the strength of the structure.
- Ease of Placement: Concrete that is too stiff will be difficult to place and compact, leading to poor structural integrity. The slump test ensures that the concrete can be worked with easily on-site.
- Prevention of Segregation: An overly fluid mix can lead to segregation, where the heavier aggregates settle at the bottom, leaving the top layer weak and prone to cracks.
- Predicting Strength: The slump value can provide an early indication of the potential strength of the concrete. A higher slump value typically correlates with lower strength, while a lower slump value suggests a denser, stronger mix.
Ideal Slump Values for Different Applications
Different construction projects require varying levels of workability depending on the structure's design and the method of concrete placement. Below are general guidelines for appropriate slump values:
- Pavements and Road Construction: 20-30 mm
- Reinforced Foundations: 75-100 mm
- Columns and Structural Beams: 50-100 mm
- Retaining Walls: 50-75 mm
The ideal slump value is determined by the project specifications and the required strength of the structure. It is important to note that slump values alone should not be used as the sole determinant of concrete quality; other tests like compressive strength tests are also essential.
Limitations of the Slump Test
While the slump test is an invaluable tool for measuring concrete workability, it does have some limitations. For instance, it does not provide information on the strength or durability of the hardened concrete. Furthermore, the test is most effective when conducted under controlled conditions; external factors such as temperature and humidity can impact results.
Additionally, the test may not give accurate results for very dry or very fluid mixes, as these can fall outside the range of typical workability measured by the slump cone.
Conclusion
The slump test is a simple yet highly effective method for evaluating the workability of fresh concrete. By providing a clear measure of consistency, this test allows for immediate adjustments to the mix on-site, ensuring that the concrete can be easily placed and compacted. As an essential part of construction quality control, the slump test helps ensure that concrete structures are strong, durable, and free of defects.
To achieve the best results, it is important to follow the procedure carefully and interpret the results accurately. With the right balance of materials and consistent testing, the slump test helps maintain high standards in concrete construction.