What's the Process for Constructing a Shed Base?
When it comes to building a shed that lasts for decades, constructing a solid and level base is absolutely critical. A properly constructed shed base ensures structural stability, prevents moisture damage, and enhances the longevity of the shed.
Planning Your Shed Base Construction
Before any physical work begins, planning and preparation are essential. Consider the following key aspects:
- Location: Choose a well-drained, level area with good sunlight and accessibility.
- Size: Ensure the base is at least the same size as your shed's footprint, or slightly larger.
- Permissions: Check local planning regulations and zoning laws. Some areas may require permits.
Choosing the Right Type of Shed Base
There are several types of shed bases to consider, each with its own advantages. The most common options include:
1. Concrete Slab Base
- Best for: Permanent, heavy-duty sheds
- Advantages: Long-lasting, robust, moisture-resistant
2. Timber Frame Base
- Best for: Light to medium weight sheds
- Advantages: Flexible, quick installation, cost-effective
3. Paving Slab Base
- Best for: Medium-sized garden sheds
- Advantages: Good drainage, aesthetically pleasing
4. Plastic Grid Base
- Best for: Small, lightweight sheds or temporary setups
- Advantages: Eco-friendly, easy to install, great drainage
Tools and Materials Needed
The specific materials may vary depending on the base type, but here's a general list for a concrete or paving slab base:
- Shovel and spade
- Spirit level
- Tape measure
- Wooden pegs and string
- Hardcore (crushed stone)
- Builders sand
- Cement and water
- Paving slabs or timber frame components
- Compactor or hand tamper
- Protective gloves and safety gear
Step-by-Step Guide to Building a Concrete Shed Base
Step 1: Mark Out the Area
Using pegs and string, mark the perimeter of your shed base. Measure diagonals to ensure square corners.
Step 2: Excavate the Site
Dig out the marked area to a depth of approximately 150mm to 200mm. Remove any vegetation and loose soil to create a firm sub-base.
Step 3: Add a Hardcore Sub-Base
Fill the excavated area with 100mm of compacted hardcore (crushed stone or rubble). Use a wacker plate compactor to ensure it is tightly packed and level.
Step 4: Add a Layer of Sand
Place a 30-50mm layer of builders sand over the hardcore. This will help in creating a smooth base for concrete or slabs.
Step 5: Install a Damp Proof Membrane (DPM)
Lay a sheet of polythene DPM across the sand layer, allowing overlap at the edges. This prevents rising damp from reaching the shed.
Step 6: Build Timber Shuttering
Construct a timber frame around the base area to hold the poured concrete in place. Ensure it is square and level using a spirit level.
Step 7: Mix and Pour the Concrete
Use a 1:2:3 mix (cement:sand:aggregate) and pour the concrete evenly into the formwork. Use a straightedge or screed to level it off.
Step 8: Level and Smooth the Surface
Tamp the concrete to remove air pockets and create a flat, even surface. Use a float or trowel to finish the surface as desired.
Step 9: Allow to Cure
Let the concrete cure for at least 48 hours, ideally longer in cold or wet conditions. Keep it covered with a tarpaulin or damp cloth to prevent premature drying and cracking.
Alternative: Installing a Paving Slab Base
If opting for paving slabs, the process includes:
- Excavate the area to the same depth (150-200mm).
- Compact a 100mm hardcore layer.
- Add a 50mm sand and cement mix (8:1 ratio).
- Lay slabs from one corner, tapping gently into place with a rubber mallet.
- Check levels with each slab to ensure a flat surface.
- Brush dry sand or mortar mix into joints for added stability.
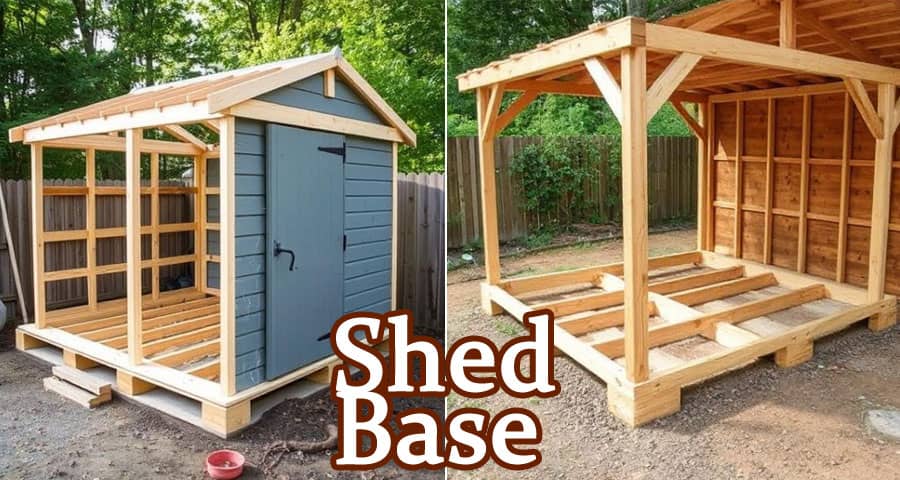
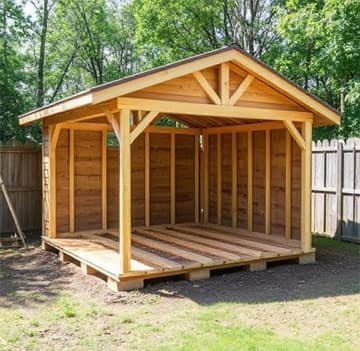
Timber Frame Base Installation
For timber bases, ideal for portable or raised sheds, the key steps include:
- Lay weed membrane to prevent grass growth.
- Use pressure-treated timber joists and construct a frame matching your shed size.
- Position the frame on concrete blocks or deck piers.
- Use a spirit level to ensure an even surface.
- Secure the shed onto the frame using coach screws or anchor bolts.
Plastic Shed Base Installation
A fast and eco-friendly method:
- Lay a weed membrane on the ground.
- Assemble the interlocking plastic grids.
- Fill grids with pea gravel or sharp sand.
- Position the shed directly on top of the stable grid.
Important Tips for Long-Lasting Shed Base
- Drainage: Ensure the base is slightly higher than surrounding ground to prevent water pooling.
- Ventilation: Leave slight air gaps when using timber to encourage airflow.
- Protection: Use pressure-treated wood to resist rot.
- Anchoring: Secure the shed to the base to prevent movement in strong winds.
Final Checks Before Shed Installation
- Confirm the base is completely level using a long spirit level.
- Ensure all corners are square.
- Allow any wet mix (concrete or mortar) to fully cure.
- Clear away debris, tools, and unused materials.
Conclusion
Constructing a proper shed base is not just a preliminary task - it is a fundamental element of building a durable, weather-resistant shed. Whether you opt for concrete, paving slabs, timber, or plastic, each method requires careful execution to ensure a flat, stable, and long-lasting foundation. By following the steps outlined above, you will ensure your shed remains secure, dry, and level for years to come.
Please view the following short video