Soil Nailing Techniques and Benefits

Soil Nailing
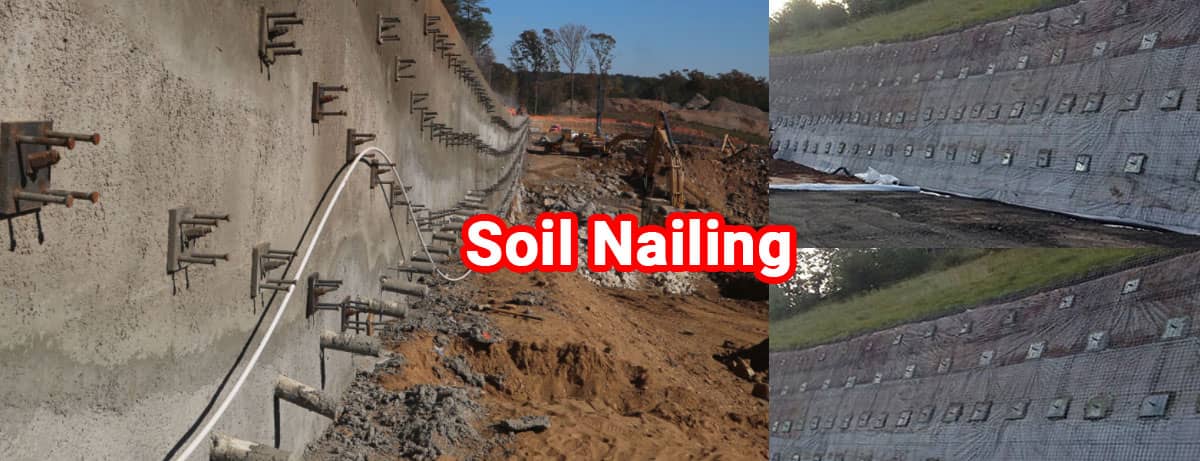
An economical method for stabilizing existing slopes and building retaining walls is soil nailing. A composite mass creates using steel tendons that drill and grouts into the soil to reinforce the soil. The most common wall facing is Shotcrete, although precast panels, green vegetated cells, or prefab panels can use. Using soil nails enhances the soil's stability. Further, it can also add stability to slopes, excavations, retaining walls, etc.
Technique Process
This technique involves inserting nails or reinforcing bars into the soil to strengthen it. Installing these bars in predrilled holes and grouting them secures them. Additionally, these nails install at an inclination of 10 to 20 degrees concerning vertical. Shotcrete, concrete, or another grouted material uses to grout steel or nails embedded in the ground.
Types of Soil Nailing Technique
Driven Technique
The purpose of it is to stabilize slopes temporarily. Driving soil nails is a fast method. However, this method will not protect the nails and reinforcement steel from corrosion. The driven soil nailing method uses to drive nails into the slope face during excavation. Nails are usually between 19mm and 25mm in diameter, which is a relatively small size. In addition, nail spacing ranges between 1 m and 1.2 m.
Self Drilling Technique
Self-driven soil nails use hollow bars. Hole-drilled bars drill into slope surfaces. After that, the holes grout when they drill. Drilled grouted nailing is a much quicker method. Last but not least, self-drilling soil nails provide better corrosion resistance than driven nails.
Drilled & Grouted Technique
A pre-drilled hole is drilled into a wall or slope face before nails are inserted. Filling the hole with concrete, Shotcrete etc. follows. Finally, nails range from 100-200mm in diameter, with a 1.5m spacing between them.
Launched Technique
A compressed air mechanism forces steel bars into the ground with a single shot. The length of the nails that penetrate the ground cannot be controlled with soil nails since they are fast to install. Reinforcement of soil mass is unstable or potentially unstable capacity into the sliding soil. Lastly, the nail has a diameter of 38mm and a length of about 6 meters.
Jet Grouted Technique
Jet-grooved soil nailing Techniques create holes in the slope surface by eroding the soil with water jets. A steel bar and concrete grout install in this hole. The jet-grouted soil nails also protect the steel bars or nails from corrosion.
Applications of Soil Nailing
- Providing stability to existing retaining walls.
- Underground facilities and high-rise buildings in urban areas need retaining structures.
- Putting a stop to the landslide.
- The stabilization of embankments and cut slopes along highways and roadways.
- Tunnel portals on steep stratified slopes in unstable terrain.
- Bridge abutments are constructed and retrofitted.
- Stabilizations on steep cuts.
- Stabilizing existing embankments that are too steep.
- Concrete structures can be made stable without having to be demolished and rebuilt.
- And finally, shoring up excavations temporarily.
Benefits of Soil Nailing
- This type of process is very versatile.
- The installation method can be modified to accommodate restricted access.
- It can shore along irregular curves and surfaces.
- For walls higher than ten feet high, soil nails are more effective and economical than driven piles.
- They also operate more quietly than driven piles.
- The footprint of soil nailing is smaller than that of regarding, especially if you have limited space for shoring.
Wrapping It Up
Typically the nails must penetrate four to five meters into the passive zone beyond the slip plane. Soil nails must be space horizontally or vertically concerning the strength of the soil. Any surface that is stabilizing should have extra soil nails installed. After excavation, soil nails should insert immediately. If not, the soil slope may collapse.
