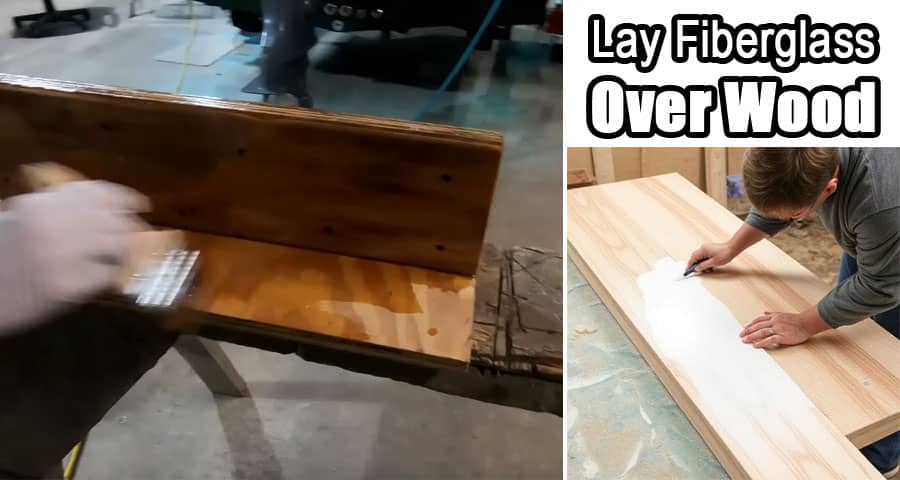
How Do You Lay Fiberglass Over Wood?
When it comes to strengthening wood surfaces, fiberglassing over wood is a time-tested technique used in marine construction, outdoor furniture, and even residential repairs. It ensures durability, waterproofing, and increased resistance to wear and tear.
Tools and Materials Needed for Fiberglassing Over Wood
Before starting the process, gather all necessary materials and tools:
- Fiberglass cloth or mat
- Epoxy or polyester resin
- Hardener (catalyst for resin)
- Mixing container
- Plastic spreader or roller
- Paintbrushes
- Acetone (for cleaning)
- Sandpaper (various grits)
- Protective gloves, mask, and goggles
- Measuring tools and scissors
Selecting the right type of fiberglass cloth and resin system is critical. While polyester resin is cost-effective, epoxy resin is superior for wood applications due to its strong bonding characteristics and low shrinkage.
Step 1: Surface Preparation Is Key
Proper surface preparation is essential for optimal adhesion.
- Clean the surface: Remove all dust, grease, dirt, and old paint or varnish. Use acetone for thorough cleaning.
- Sand the wood: Use 80-grit sandpaper to roughen the surface, ensuring the resin will grip the wood properly.
- Dry the wood: Ensure the wood is completely dry. Moisture trapped under fiberglass can cause delamination or rot over time.
Step 2: Measure and Cut the Fiberglass Cloth
Lay the fiberglass cloth over the wood surface to be covered. Cut it generously, allowing at least two inches of overhang on all sides. If working with corners or curves, make relief cuts for a smooth fit. Multiple layers can be prepared in advance for strength enhancement, but they should be applied one at a time while the resin is still tacky.
Step 3: Mixing the Resin Properly
Mix your chosen resin with the hardener according to the manufacturer's specifications. Ratios must be exact. Too much hardener can lead to brittleness or overheating, while too little may result in uncured sticky surfaces. Use clean containers and stir sticks. Work in well-ventilated areas, and always wear protective equipment.
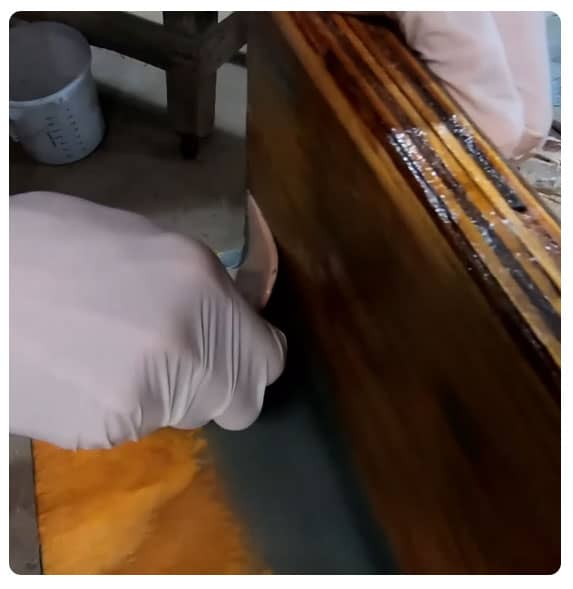
Step 4: Apply the First Coat (Wet-Out Coat)
Begin with a thin, even coat of mixed resin directly on the wood using a brush or roller. This is known as the wet-out coat. Its purpose is to seal the wood grain and prevent it from absorbing resin from the fiberglass layers.
Let the wet-out coat sit until it becomes tacky but not fully cured - usually around 30 - 60 minutes depending on temperature and humidity.
Step 5: Laying Down the Fiberglass Cloth
Carefully place the fiberglass cloth over the tacky wet-out coat. Smooth it gently with your hands or a plastic spreader to remove air bubbles and wrinkles. Work from the center outward. Do not stretch the fabric.
Once it's flat and in position, apply resin over the fiberglass with a roller or brush, saturating the cloth thoroughly. The cloth should become transparent when fully saturated. Avoid dry spots and overworking the resin, which can cause wrinkles or air entrapment.
Step 6: Dealing With Bubbles and Imperfections
Use a bubble roller or squeegee to eliminate air pockets. These bubbles can compromise strength and appearance. Continue smoothing until the surface is uniformly saturated and bubble-free.
If bubbles reappear as the resin cures, lightly puncture them and re-roll the area. Surface tension will usually pull the resin back into place.
Step 7: Let It Cure Completely
Allow the fiberglass and resin to cure fully according to the resin manufacturer's instructions. This can take anywhere from 6 to 24 hours. Avoid disturbing the piece during this time. Protect it from dust, wind, and insects by covering it loosely with a breathable fabric or tenting material.
Step 8: Trimming Excess and Final Sanding
Once cured:
- Trim the excess fiberglass from the edges using a utility knife or sanding disc.
- Sand the surface starting with 80 - grit and finishing with 120 - grit sandpaper.
- Clean the surface with acetone or a dry cloth to remove sanding dust.
This step ensures a smooth, professional finish and prepares the surface for painting or a second resin layer if needed.
Step 9: Applying Additional Layers for Strength (Optional)
For applications requiring extra durability, repeat the fiberglassing process:
- Lightly sand the cured surface.
- Apply a fresh coat of resin.
- Lay another fiberglass layer while the resin is still tacky.
Each added layer should overlap the previous one by at least one inch. Generally, 2 - 3 layers are sufficient for marine and structural uses.
Step 10: Finishing Touches - Painting or Sealing
Once the final layer is cured and sanded:
- Apply a UV-protective topcoat if using epoxy resin, as it can degrade in sunlight.
- Consider painting the surface with marine-grade paint for aesthetics and further protection.
- A final coat of polyurethane or clear gelcoat may also be used for a glossy, sealed appearance.
Common Mistakes to Avoid
- Failing to properly sand and clean the wood before fiberglassing
- Using incorrect resin-to-hardener ratios
- Applying fiberglass over uncured or overly cured base coats
- Ignoring temperature and humidity recommendations
- Over-brushing, which can create air pockets
Applications of Fiberglassed Wood Surfaces
Fiberglass over wood is frequently used for:
- Boat hulls and decks
- Outdoor furniture
- RV and trailer floors
- Plywood subfloors
- Structural beams or supports exposed to moisture
The added durability and moisture resistance make it ideal for any project requiring long-term resilience.
Final Thoughts
Laying fiberglass over wood is a highly effective way to reinforce, waterproof, and prolong the life of wooden surfaces. Whether you're restoring a boat or building a custom outdoor project, following the correct procedures ensures lasting and professional results.
Plwase view the following short video for Lay Fiberglass Over Wood